Tuesday, August 29, 2017

Stamped with Love


It's my latest obsession.
It's fun and helps relieve some stress.
It's addicting!

Over the last few months I've found myself on Pinterest more and more looking up metal stamping.  It all started back in May when I wanted to have some cute spoons or keychains stamped as a "thank you" gift for the members of a spouse club I'm in.  Well when I asked for a price quote I had to drink some water to stop from coughing so much.  For the stamped items alone it would've been more than my entire budget for the party.  So I had to come up with Plan B.

Enter Pinterest ...

That's right I got onto Pinterest because I was curious to see what other type of stamped metal there was out there.  And the more I saw the more I was like.. "Oh I could so do that myself".  I mentioned it to my husband, and he agreed I could buy and make what I want for less than I was quoted.

So off to Michael's I went with my credit card in hand...

And I walked out with a bag full of brand new tools and high hopes.

The advantage to being married to a man who is a welder is we always have scrap metal lying around the house (well the garage).  He gave me a few pieces to test my stamping on before I started to use my blanks.  After several attempts to figure out the right amount of pressure needed, I was ready to go!

My first attempt was to make a bracelet (for myself of course) and I was pretty pleased with how it turned out.  I mean for a beginner its not to shabby!


Once I felt comfortable with that I decided to try my hand at these key chains I wanted.  Since its for a Military Spouses' Club, I thought using a "dog tag" would be cute.  And well the yellow ribbon goes with the military too right?!

Yup so back to Michael's I went with my credit card in hand.

A bottle of wine, my tools all laid out and the idea fresh in my mind I started to hammer away.  5 retakes later and I finally had the hang of what I was doing and I was loving how it all turned out.  (Sadly I didn't take any "in progress" photos)


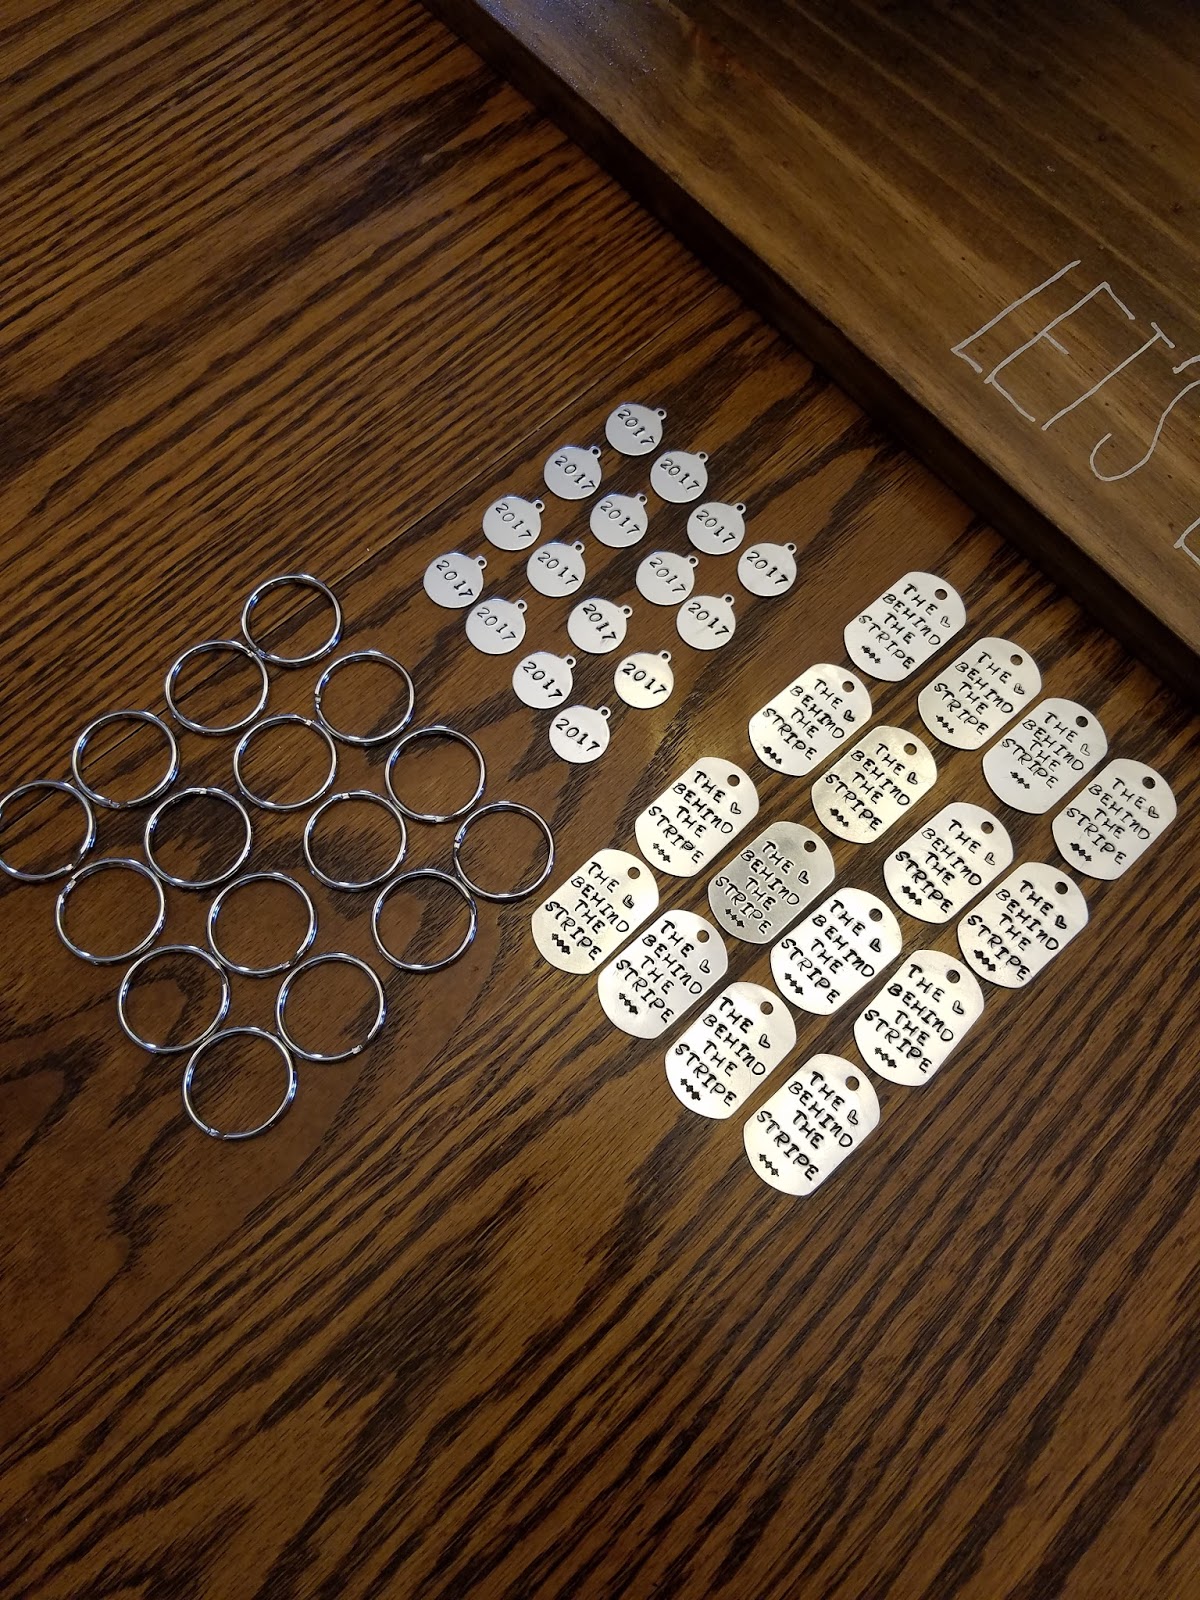
About 2 hours later I had all 12 dog tags and circles stamped with our motto and year.  Now everything is ready to assemble.

Viola!


And since then I've been on a stamping craze!  I've made several cuff bracelets and I've recently started trying out charm bracelets and necklaces.  I've added more stamps to my collection and looking up new ideas.


That's it for today.. check back later for what's behind my heels!
XO- Beth

Thursday, August 24, 2017

Big Girl Bedroom Make-Over


My kids are getting older and are starting to out grow their "baby" rooms.  Part of me is like "yes, they're becoming big kids, I love this!" where the other part of is me is like "no my babies are growing up too fast... SLOW DOWN!".  But regardless they're growing and it's time to do some room updating.  My son's room reflects him pretty well, but my daughter's room looks like a toy store exploded and everything was a hodge podge of items.

Recently I came across a post online about someone selling an older dresser, which reminded me of the dresser my older sister had when we were kids.  I was in love with it and always wished I would get one like it too, side note: I didn't.  So when I had the chance to buy this one I jumped on it.  It was in good condition but needed some TLC.

(There were stickers all over the drawers from decades ago, and the paint white had yellowed with age)

After spending (more time than I should) on Pinterest and with the help of my friend, I found the perfect inspiration for making over this dresser.  Originally I was going to keep it classic and simple, but realizing it was going into my soon to be 6 year old daughters room, I wanted to make it cute and chic.  So off to Lowe's I went in search of some paint.

(Pictures from Pinterest)

I've painted furniture before, but it was always a slap some paint on it and call it a day job, so this time I wanted to take my time and do it right.  At Lowe's (one of my weaknesses) I picked up a can of Valspar Chalky Finish Paint in "Kids Gloves" color then a can of Valspar Sealing Wax.  Lastly I grabbed a sample bottle of Valspar in Baby Blush.  This was going to be the pop of color on the drawers.  To be safe before I started sanded the rough edges and primed the dresser with some Valspar Bonding Primer/Sealer.

(From Lowes.com)
Once I had all my supplies gathered up and the kids went off to Grandma and Grandpa's for the week, I turned on the music and zoned out!

A little (okay a lot) of sanding to get the old stickers off, then a coat of primer and I was off.  I took the handles off and spray painted them a beautiful metallic gold.  After the primer was dried I applied 2 coats of the chalky paint and let it dry overnight.  Then I added the sealing wax and again let it dry overnight.  Once all that was finished and the painting tape was removed (around the mirror) I found a gold paint pen, and yes, I hand painted detail lines on the dresser and around the mirror to add a pop of gold to match the handles!  Hmm, maybe this contributed to my carpal tunnel?!


In total this dresser took me about 3 days to complete.  Granted I had house work, volunteer work and the occasional break for you know sleeping and eating!  But the finished product just made me smile!  I still walk into her bedroom 2 weeks later and I still smile at how it turned out!

(Don't mind the mess... I wasn't finished cleaning and re-arranging her room!)


Once I got started on this a close friend of mine mentioned that she had a desk that almost matches this dresser and that I could have it.  So naturally I said YES after thanking her a million times.  I got it home and upstairs and began to prep it.  I did the same color scheme, but since it was smaller and had less detail to do it was a lot faster to makeover!


Naturally once it was finished I couldn't wait to decorate it with a few new desk accessories we found at Marshalls.  Seeing the look on my daughters face when she came home though was priceless.  My wrists may have been throbbing (and yes they still hurt a lot) but the pain and late nights were totally worth it!


I'm already looking forward to my next piece of furniture to makeover!

That's all I've got for now, but check back next time to see what new is happening behind my heels!

xoxo - B

Tuesday, August 22, 2017

Back At It Again


I feel like Rose from the beginning of Titanic... "it's been, 84 years..."

I haven't blogged in over a year.  And even then it was a hit or miss, and to be honest I've missed it.  I've missed checking out other bloggers, sharing my life and learning new things.  The last 1.5 years have been CRAZY!  If you follow me on Instagram then you've probably seen some of the things I have been up to.  But if you don't follow me (@behindmyheels) then you should ;)

To start, my online clothing store (The Eight-Eleven Boutique) is still up and running and I'm loving every second of it!  I've been lucky enough to stay home while I run my business and run the house hold.  In the last year I've started traveling around the Dayton area with my store and doing Pop-Up Shops.  Its a great way to meet new customers and of course for people to see/try on the clothes in person.  It has its up and downs, like I can't stand doing the bookkeeping!  But being able to show my kids that yes you can follow your dreams and do the job you love.  Plus being able to decide what to stock is always fun!  Check out one of my many favorite outfits:


Seriously, isn't this just the cutest outfit?!  The de-masked tank is silky soft, the shorts are totally adorable and those shoes... SO comfortable!  Head on over to my website www.eightelevenboutique.com and you can shop this look ;)

***

I've also found a new hobby, yeah like I REALLY needed a new one!  A few months ago I was looking at some items online that I was hoping to get for a spouse club I'm a part of... well their prices were way out of our budget.  So I looked up what I needed, ran to the store (okay I drove) and got the supplies needed.  Now I like metal stamping, so far I've made primarily bracelet cuffs, but I'm hoping to branch out and try some new things soon.


This was a mother/daughter set I made for a friend.  Isn't it precious! <3

***

As I sit here typing this, I'm trying not to cry out in pain.  Why.. oh you know just a small (okay major) case of Carpal Tunnel and Tendinitis in my wrists.  How did this happen.. well I might have made just a "few" cakes and cupcakes over the last couple of months.  What can I say, I love to bake and everyone loves to eat them.  I'll do a few posts of the cakes I've done but for now enjoy this one.. but don't lick your screen!


I've been wanting to make the "ice cream drip cake" for a while.  One day I was bored and had nothing going on so my husband and kids got to be my taste testers!  It's a french vanilla cake, with a confetti buttercream filling and topped with a white chocolate ganache.

***

That's just a few things that have been keeping me occupied!

I created a Facebook page to stay better connected with friends, family, customers and bloggers.  I'd love for you to check it out as well!

But for now I'm going to log off, ice my wrists and watch tonight's episode of America's Got Talent!

xoxo - B

On Instagram

© Behind My Heels. Made with love by The Dutch Lady Designs.