Tuesday, October 31, 2017

Happy Halloween


One of my favorite days of the year is here.. Halloween!

I mean who doesn't love an excuse to dress as someone else and eat your weight in candy?!  Not to mention the scary movie marathons!  Halloween is definitely one of my favorite Holidays outside of Christmas and my Birthday 😜

The last several days have been jammed packed (which is why I wasn't able to post last Thursday).  Between the boutique, the kids and being locked away in my kitchen it's been madness here.

I spent a good 24 hours baking up a storm in my kitchen.  I had a friend who was organizing/attending a zombie themed party, who asked me to make some gruesome cupcakes.  Of course I couldn't say no!  I made them some "bloody brains & eyeball" cupcakes.


These "bloody brains" are red velvet with a cream cheese frosting.  Then they were drizzled in a bloody cornstarch mix.  I also made 2 dozen grey goose jello shots using syringes so the guest could either insert them into their cupcakes or take the shot on its own.


Now these "Bloody Eyeball" cupcakes were probably my favorite!  They look all pretty with the rose piping but then the gruesomeness is added with the blood and eyeballs.  They're a vanilla cake with a strawberry puree filling topped with a vanilla buttercream.  Again I used my bloody cornstarch to drizzle over a gumball eye.

The day before I started baking these I had the honor of baking an "I Beat Cancer" cake.  Another friend's mother in law just kicked breast cancers butt and they wanted to celebrate.  I was more than willing to squeeze this into my schedule!


This one is a triple layer chocolate cake with a vanilla buttercream.  I tried something new (for me) and used a star tip to do a pink ombre around the side.  I then topped it with a fondant ribbon sprinkled in pink sugar and cut out the words using gumpaste.  Out of all the cakes I've made, this is in my top 10 favorites.

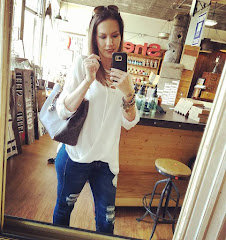
Of course since its Halloween, I have to share my new favorite black shirt.  I just recently got this in my boutique and I'm tempted to order more in other colors.  It's buttery soft, loose fitting and the criss cross neckline is right on trend.  I may have worn it a few times now!  But it looks great tucked in, on its own or layered up.


I was totally having a mom moment here.  My daughter was throwing a fit off camera so of course my husband had to catch me in action!


Shop my outfit at www.eightelevenboutique.com

And as an added Halloween Treat for all my readers/followers... shop my look and the rest of my website for 31% off today only!  Use discount code: ALLHALLOWSEVE at checkout!


XO - Beth

Monday, October 23, 2017

Halloween Wars


I'm not much for cooking shows, but I'm obsessed with watching Cake/Cupcake Wars.  And at Halloween time, I LOVE to watch Halloween Wars.  What these cake artists can do with pumpkin, sugar and cake blows my mind.  And I wish I had half the talent they do.

The last several years I've been watching this show, and it never gets old.  Each season the detail and displays get crazier and crazier!

My only question... what do they do with all that cake?!

Remember my post a little while ago where I taught a Pinterest Class for the spouse club I'm in?  Well I gave y'all a sneak peek at the cupcakes I made for it.  I mean you can't have a party and not have sweets right?  But then again I'm always looking for an excuse to bake!

I saw these cupcakes on Pinterest while looking up ideas for an upcoming Halloween Party I'm baking for.  And I had to give it a try!

I mean who wouldn't want to take a bite of some bloody glass cupcakes?!

I've never attempted to make sugar glass, but how hard could it be?


The recipe seemed easy enough.  And honestly it was, but it took a little longer (and two batches) than I thought.

To make this all you need is 4 simple ingredients that you can find in your pantry:
- 1 Cup Corn Syrup
- 1/4 Tsp Cream of Tarter
- 3 1/2 Cups of Sugar
- 2 Cups Water

You'll also need a candy thermometer, spatula, pot and a metal cookie sheet.  Throw all four items into the pot and turn on high.  If you start off low/medium, it'll take forever.  So take my word and start on high!


You'll want to stay near your stove, because you need to constantly stir with a rubber spatula.  Make sure to keep your candy thermometer in the pot the whole time to measure the temperature.  Once you hit 300° immediately take it off the burner and pour onto your metal pan so it can cool completely.  After it's cooled, drop the pan on the counter or take a meat hammer and smash it into shards!


For my cupcakes, I kept it simple with a french vanilla cupcake and buttercream.  I piped it using a star tip.  I used red icing with a few drops of brown and thinned it out until it was "soupy" like.  Using a small spoon, I splattered and drizzled it on to give it a bloody look.  Finally I topped it with my "glass" shard.


Needless to say, everyone was a little freaked out and thought I lost my mind!  Once they figured out it was sugar and not real glass they dug in!  I ended up with a few left over and took them home for my kids.  After about 2 days the "glass" melted into the icing.  Darn you humidity!

If you thought these were creepy, stay tuned!  I have a few more Halloween cupcakes to come!

XO - Beth

Thursday, October 19, 2017

Hello Purple


I did it!  I mean I finally did it!

For years, I've been working up the guts to do purple in my hair.  I've gone blonde, black, red and every shade of brown that you can think of.  About a year ago I was having an emotional evening, (and yes I was totally PMSing) and ran to Target for some Ben & Jerrys and I grabbed a box of burgundy hair dye.  A pint of ice cream and 2 hours later I had beautiful redish/purple hair.  I loved it, but I wasn't comfortable with the looks people gave me.  Hello I had red and purple hair!

(Get my top here)
(When I had shorter burgundy hair)

I went back to being a brunette, and stayed that way.

Then I met a new friend who just moved to the area and happened to be a hairdresser.  Another friend of mine knew her and raved about her skills.  I was due for a trim (I swear I'm like the worst person when it comes to getting my hair trimmed on a regular basis), and decided to call and make an appointment.

The End!

LOL  Just kidding, but seriously if I had it my way, she'd be my hair stylist from here on out.  But being military, that's just not possible.

Anyways, I was telling her I love purple, but I don't have the guts to put it in my hair.  We decided to ease me into it, buy doing another burgundy in my hair.  But this time she did a faded in look, so I'm still a deep dark brown on top and it fades into burgundy.

And. I. Loved. It!

The best part was, my husband was so in love with the look too, he told me to keep it!

(Get my top here)
As with most hair coloring, it starts to fade.  When I mentioned I was going back to have color put back in, my husband was like go purple!

Spoiler Alert: I did!


I just love how in different lighting the color looks different.  In the shade its has a blueish tone, whereas in the light its more a redish tone.

I've never loved a color more than I do with this color.

(Get my green jacket here)
I find it funny that my lipstick matches my hair!

Have any of you tried a new look out and loved it/hated it?

XO- Beth

Tuesday, October 17, 2017

Pumpkin Picking


Nothing like a nice crisp Fall day to take the kids and go pumpkin picking right?!  WRONG!!!!  It was hot and windy and so not Fall like!  I was hoping for a nice nip in the air, some hot cider, a cute blanket scarf for the perfect photo op and we got almost 90 degrees and crazy strong winds!

Ohio weather sure is crazy!


But nothing was going to stop my kids from finding their perfect pumpkin!  My daughter was determined she was going to find the right sized perfectly round pumpkin.  She kept tiptoeing over pumpkins saying nope not the right one.  Nope that's not it. Nope. Nope. Nope! lol  I swear we would still be there if we she had her way!  Now my son, well he was opposite, he wanted the biggest and fattest one he could find.  He'd say yup, that's the one, then 5 seconds later, OH MOM I found a bigger one!


After walking to the back of the field and sweating about 10lbs off, I think we all found the ones that were just right for us.  Hunter found his BIG one, Allison her Pretty Round one, while Jeff and I found ones we were pretty happy with.


All in all the day was hot but memories were made.  We went through a corn maze (and got lost... a lot).  We now have 4 pretty pumpkins and I've got cornstalks and hay bails for my front porch!


Do you decorate your front porch for the Fall?  If so what's your must have item?


Happy Fall Y'all ;)
XO- Beth

Thursday, October 12, 2017

Cookies n Cream


Mmmm who doesn't love some Cookies n Cream?

Earlier this month, my husband and I celebrated out 12th Wedding Anniversary.  12 YEARS!  I swear it still feels like we're in our early 20s and going on our first date.  Now we're an "old" married couple.  We finish each other sentences, I drive him crazy with all my hobbies, and he drives me nuts with all her adventures!  But I wouldn't change a thing.

In 12 years we've moved to 4 different states; Idaho, Alaska, Arkansas and now Ohio.  We've welcomed two beautiful, happy and insanely smart children into our family and we've survived 3 military deployments.  None of those were easy.  His first deployment our son was only 5 months old, our 3rd deployment he missed the birth of our daughter.  But if anything it's only made our marriage stronger.


Of course you can't celebrate your anniversary without a cake!!  Or is that just me?  I swear I'll make any excuse to get in my kitchen and bake a cake!  I've seen a cake similar to this on Pinterest and I've been looking for a reason (okay an excuse) to make it.  I had a few other cakes I was baking that weekend for other people and had some left over so figured hey why not!


Since this cake was only going to be just for the four of us, I kept it to a 6 inch cake.  I also tried doing something different and made a marble cake.  Chocolate and Vanilla cake swirled together!  Best of both worlds right?!  For the icing I crumbled up some oreos and layered that inside the cake.  Then I added another layer of simple buttercream on the outside.  Drizzled some chocolate over the top and finished it off with some more oreos.  Let's just say we were all chocolate wasted!


A couple of days before our anniversary a friend of mine posted that she had a stray kitten at her house that her neighbor rescued from nearly being hit by a car.  Unfortunately her neighbor was allergic to cats and my friend just couldn't take in another animal, so she posted her on Facebook looking for a loving home.  We have been looking for a female kitten for a few months now so I should my husband and he told me to go get her!  Since it was the weekend we had to wait until Monday to take her into the vet to ensure she was okay and healthy.  She got a great bill of health, minus having a few belly bugs and that she was only 4 weeks old.


We first named her Channel but after calling her that a few times we realized it didn't suit her.  So we officially renamed her.. wait you'll love this.. Cookie!  Get it.. Cookies n Cream?!?!


I know.... purrrrrfect right?!

All in all we had a perfect weekend spending it with our little family and our newest addition!  We're all still adjusting (our older cat Bella still isn't happy with us) but after 12 years together.. I think my husband and I can handle anything!


Finally the weather has decided to cool off so I can start breaking out my colder weather items.  Sadly the top and cardigan I am wearing are no longer available through my store, but I'm hoping they'll become available again so I can restock them!


Love this necklace?  Stay tuned for a post about it coming soon!


Most of this look is currently out of stock, but feel free to shop other looks at www.eightelevenboutique.com

My kids have tomorrow off from school.. so today is my "Friday" so I'll go ahead and wish y'all a happy weekend!

XO - Beth

Tuesday, October 10, 2017

Pinning-It


You know the saying "Winning It".. well today my saying is "Pinning It!"

That's right.  I'm a proud carrying, paint and stain covered Pinterest winner!

The spouses' club I'm a part of, hosts a bi-monthly "Pinterest Night."  Because um, hello Pinterest is amazing (and evil) and it's always fun to find something and re-create it!  Well, lucky me, I taught this month's class.  We wanted something that everyone would love and enjoy.  And with all of us being military spouses, that personal touch always adds a little something extra to our homes.

I gave our spouses two options. 1) "This is us" 2) Their Initial, Last Name and the year they were married.


We used a 10 inch by 8 foot Pinewood for the main part of the sign, and a 1 inch thick Oakwood for the trim.  To stain the trim I used MinWax-Special Walnut 224 stain.  Two coats of that and it was the perfect shade!

To speed up time, my husband and I pre-cut and built each sign.  I stained each trim piece prior to assembling the rest of the sign.  I knew if we did it all there from start to finish we would either need a whole lot of wine or it would turn into a sleepover!

Once all the boards were built, I used my Silhouette Cameo to create each stencil using Contact Paper. I prefer to use Contact Paper, mainly because its inexpensive and it sticks nicely to the wood.  And when you're ready to peel it off, it doesn't leave a residue.


Again to save time, I went ahead and added painters tape on all the trim so when they put the first coat of paint on it would touch the trim.  Then it was time to box it all up and get ready for our fun night of painting!


Of course you can't attend Pinterest Night during October without some cupcakes!  Check back soon for a post on these "Bloody Sugar Glass Cupcakes"!


Once we got started I asked all the ladies to first add 2 thin coats of black paint.  Doing thin coats helps it to dry faster and prevents from having dried clumps of paint.  The best part of doing this with friends is while we wait for the paint to dry we could all enjoy the snack and of course girl talk!


After about 30 minutes or so, we added the next step of applying the contact paper stencil.  This part can be kind of hard.  Using a hard card to press the white part onto the board while removing the clear paper on top, go slowly and if it doesn't stick just put it back down and try again.  It takes some practice but eventually it will come off.  Then press down all over the letters to ensure there aren't any bubbles and add another very thin layer of black paint over the letters.  This helps prevent the white paint from bleeding through.


Finally once the last bit of black paint dries, I had everyone do another 2 layers of thin white paint.  I know some of you are probably confused as to why they are putting white paint over a white stencil.  This is called the PVPP method, Paint, Vinyl, Paint, Peel.  I prefer not to use vinyl on my signs mainly because over time they will eventually begin to peel off.  Where as with paint, if it chips or gets scratched, it'll add to the look.

Once the white paint has dried, using a knife/spatula we carefully peeled off the stencil.  And we were left with these beautiful rustic chic signs!


TA-DA!!  I'm so happy to call these ladies my friends and that I was able to teach them how to make a special sign for their own homes!  It was a fun night of laughing and paint.

If you would like more details or have a question on how something was done, please feel free to leave a comment.

XO-Beth

Tuesday, October 3, 2017

Fresh From My Oven


Ever walk into a house and it smells so good that it reminds you of home or a fond memory?

That's what banana nut bread does for me.  It reminds me of my grandma teaching me how to stir the batter correctly, watching my mom make it from scratch and it gives me that overall sense of home.

I can't even begin to count how many times I've made this recipe.  I've made it so much I have it just about memorized.  From being a newly wed and wanting to impress my husband with something I made from scratch, to now, 12 years later, having my kids get all excited when they see me setting out the ingredients for it.  Banana Nut Bread will always be a staple in our home and I hope for my kids it will always remind them of home.

Lately I've been on a baking spree.  Maybe because I haven't baked a cake in a week or I just have the urge to use my hands and make something delicious for the family.  Whatever is motivating me, I love it.  In the last week or so, I've baked both an apple and pumpkin pie, apple fritter bread, cookies and a few other delicious desserts.  What can I say.. I'm a sucker for sweets!

But one night I was laying in bed watching some mindless tv and my mind started to wander.  I had made this apple fritter bread (we went Apple Picking recently and I had a ton of apples on hand) and I couldn't stop thinking about how the cinnamon sugar mixture really made that bread extra delicious.  Now I'm a little on the weird side, where I don't like cooked fruit/veggies.  Something about the texture really grosses me out!  Anyways I loved that bread, but I love making my banana nut bread even more.  So I thought.. hey why not tweak the recipe a smidge and add some cinnamon sugar to it.


Forgive my photos.  I'm horrible about taking "in progress" photos and staging them so they look pretty!  If you have any tips I'd love to hear them. 😉

Normally I use my Pampered Chef stone loaf dish, but I have become obsessed with Rae Dunn!  Like seriously every room in my house has at least one of her pieces in it!  Yes I know.. I'm crazy!  Anyways I love using my Rae Dunn Bake dish now, only problem (and yes I learned this the hard, smelly way) is you can't use all of the batter in these dishes, but you can use it in the Pampered Chef one.


Anyways, like I was saying, I decided to tweak this recipe.  It's a pretty basic one, but I wanted to try adding a cinnamon sugar mixture to see how that would turn out.

Spoiler Alert: IT WAS AMAZING!!!!!

So to start off, I gathered all the items I needed.  My mom's original recipe (don't ask me where she got it from because I couldn't tell you), calls for 3 bananas.  To me thats overkill, so I only use 2.  The riper the better, but if they're fresh off the farm its still okay to use them.  Just make sure to mash them really well.

Mix your cinnamon and brown sugar together and set aside.  Continue mixing all the ingredients (and don't forget to preheat your oven!)


Once everything has been mixed, its time to toss it into the dish and get to baking!  But first, make sure to grease your dish.  Whether its a stone, glass, or porcelain, adding a bit of crisco (and flour if you wish) will help in keeping your bread from sticking to the dish.

Now start pouring in the batter.  But only fill it about 1/2 way.  Drizzle a good amount of the cinnamon sugar mixture.  Then add the remaining batter and then the rest of the sugar.  But keep an eye on your dish.  If it looks like it's getting 3/4 full... STOP!  Trust me on this!

Side story: (Picture it, 3 days ago...  I was dancing around my kitchen doing some baking of a delicious banana nut bread.  I had it filled nice and full, I placed it in the oven.  20 minutes later my house starts to smell a little funny.  I go and check on the bread, I open the oven and POOF.  Smoke billows out.  Yes.  I had overfilled my dish and it was currently creating a nice volcano affect... in-my-oven!  So I rush to do damage control.  One burnt pinky, a kitchen filled with smoke and a few spoonfuls of batter in the trash later, the dish is placed back in the oven to finish cooking)


Once you fill your dish, take a butter knife and slowly swirl it in the batter.  This helps distribute the sugar mixture within the batter nicely.  Now pop it in the oven for about an hour of so (after 40 minutes check on it.. if the top is looking done, but the center is still gooey, throw on a piece of foil and continue to cook).  Make sure you check the center using a butter knife.  Once it comes out clean pull it out and let it cool!


Once it cools enough to where you don't burn yourself (again in my case) cut a slice off, slather on some butter and enjoy!


It never seems to last long in my house!!

Enjoy the altered recipe!


XO - Beth

On Instagram

© Behind My Heels. Made with love by The Dutch Lady Designs.